Deploy Your First Smart Contract
In this guide, you'll deploy your first smart contract on the Axiomesh blockchain. Before you begin, ensure you've completed the following checklist:
Step 1: Compile and deploy your smart contract in the editor below
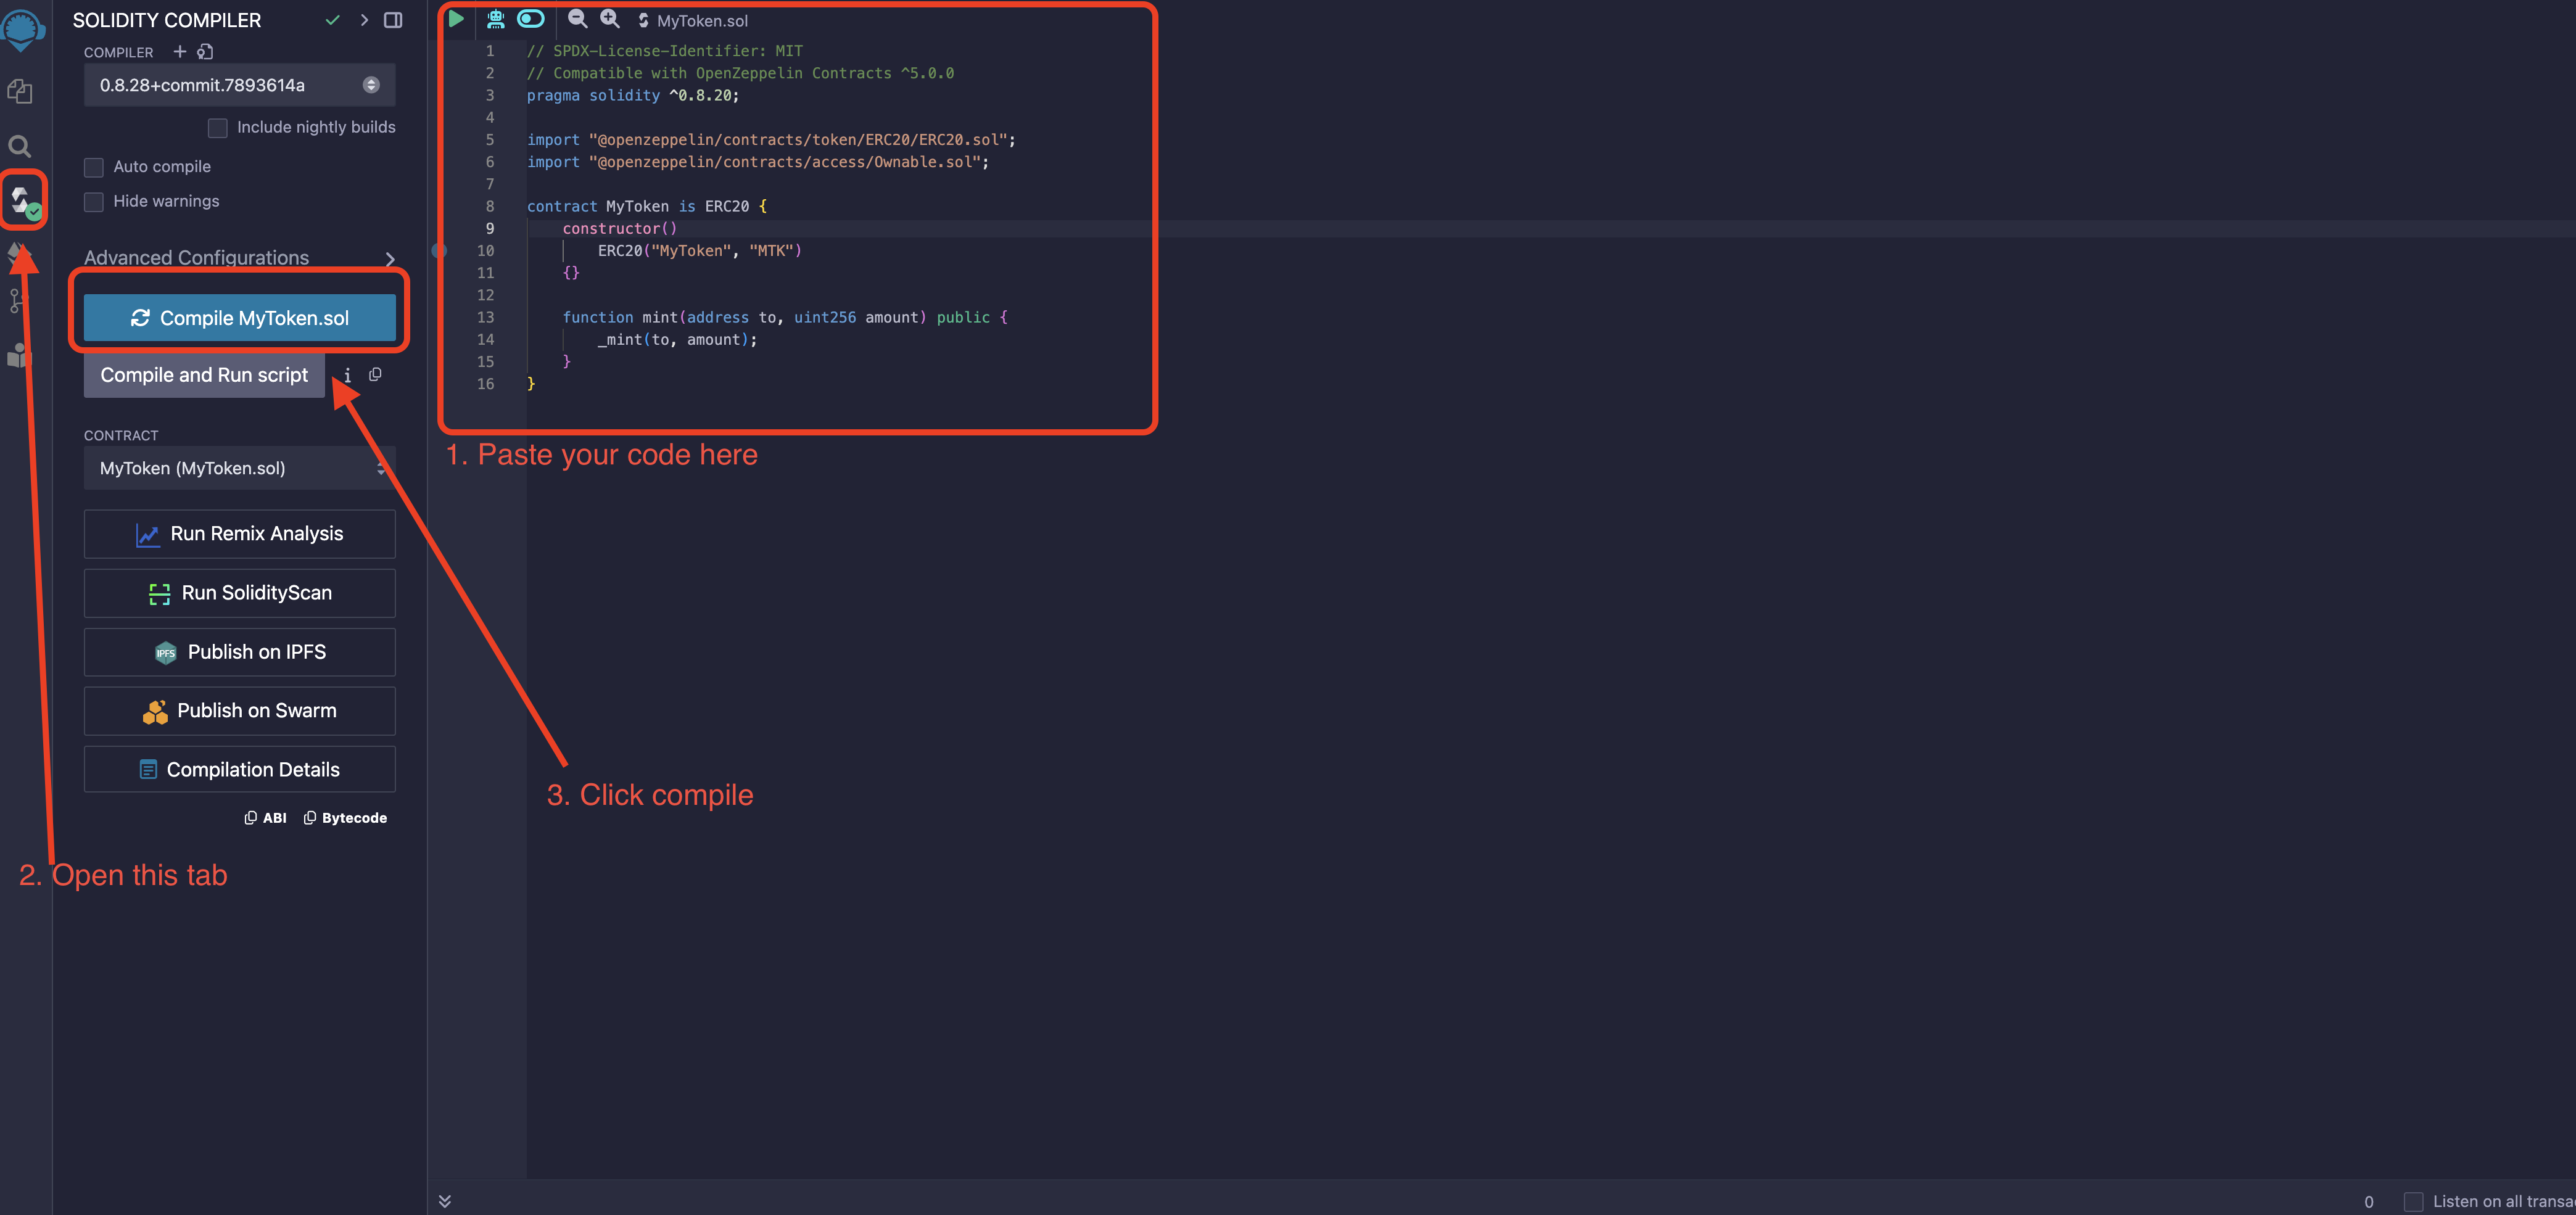
Write your smart contract in the editor below and compile it. We’ve provided a simple contract to help you get started. Make sure that your contract includes a mint function for the UI to work correctly.
NoteIf you make changes to the contract, you’ll need to delete and redeploy it for the UI to reflect those updates.
Once the contract is compiled, the output will be displayed below.
TipSolidity encodes metadata into the bytecode, which helps the EVM understand the contract's interface and ABI. You can use this website to decode the metadata.
Step 2: Deploy your contract using Remix
To deploy your smart contract:
- Visit Remix IDE and paste your contract code into the editor.
- Click the "Compile" button to compile your contract.
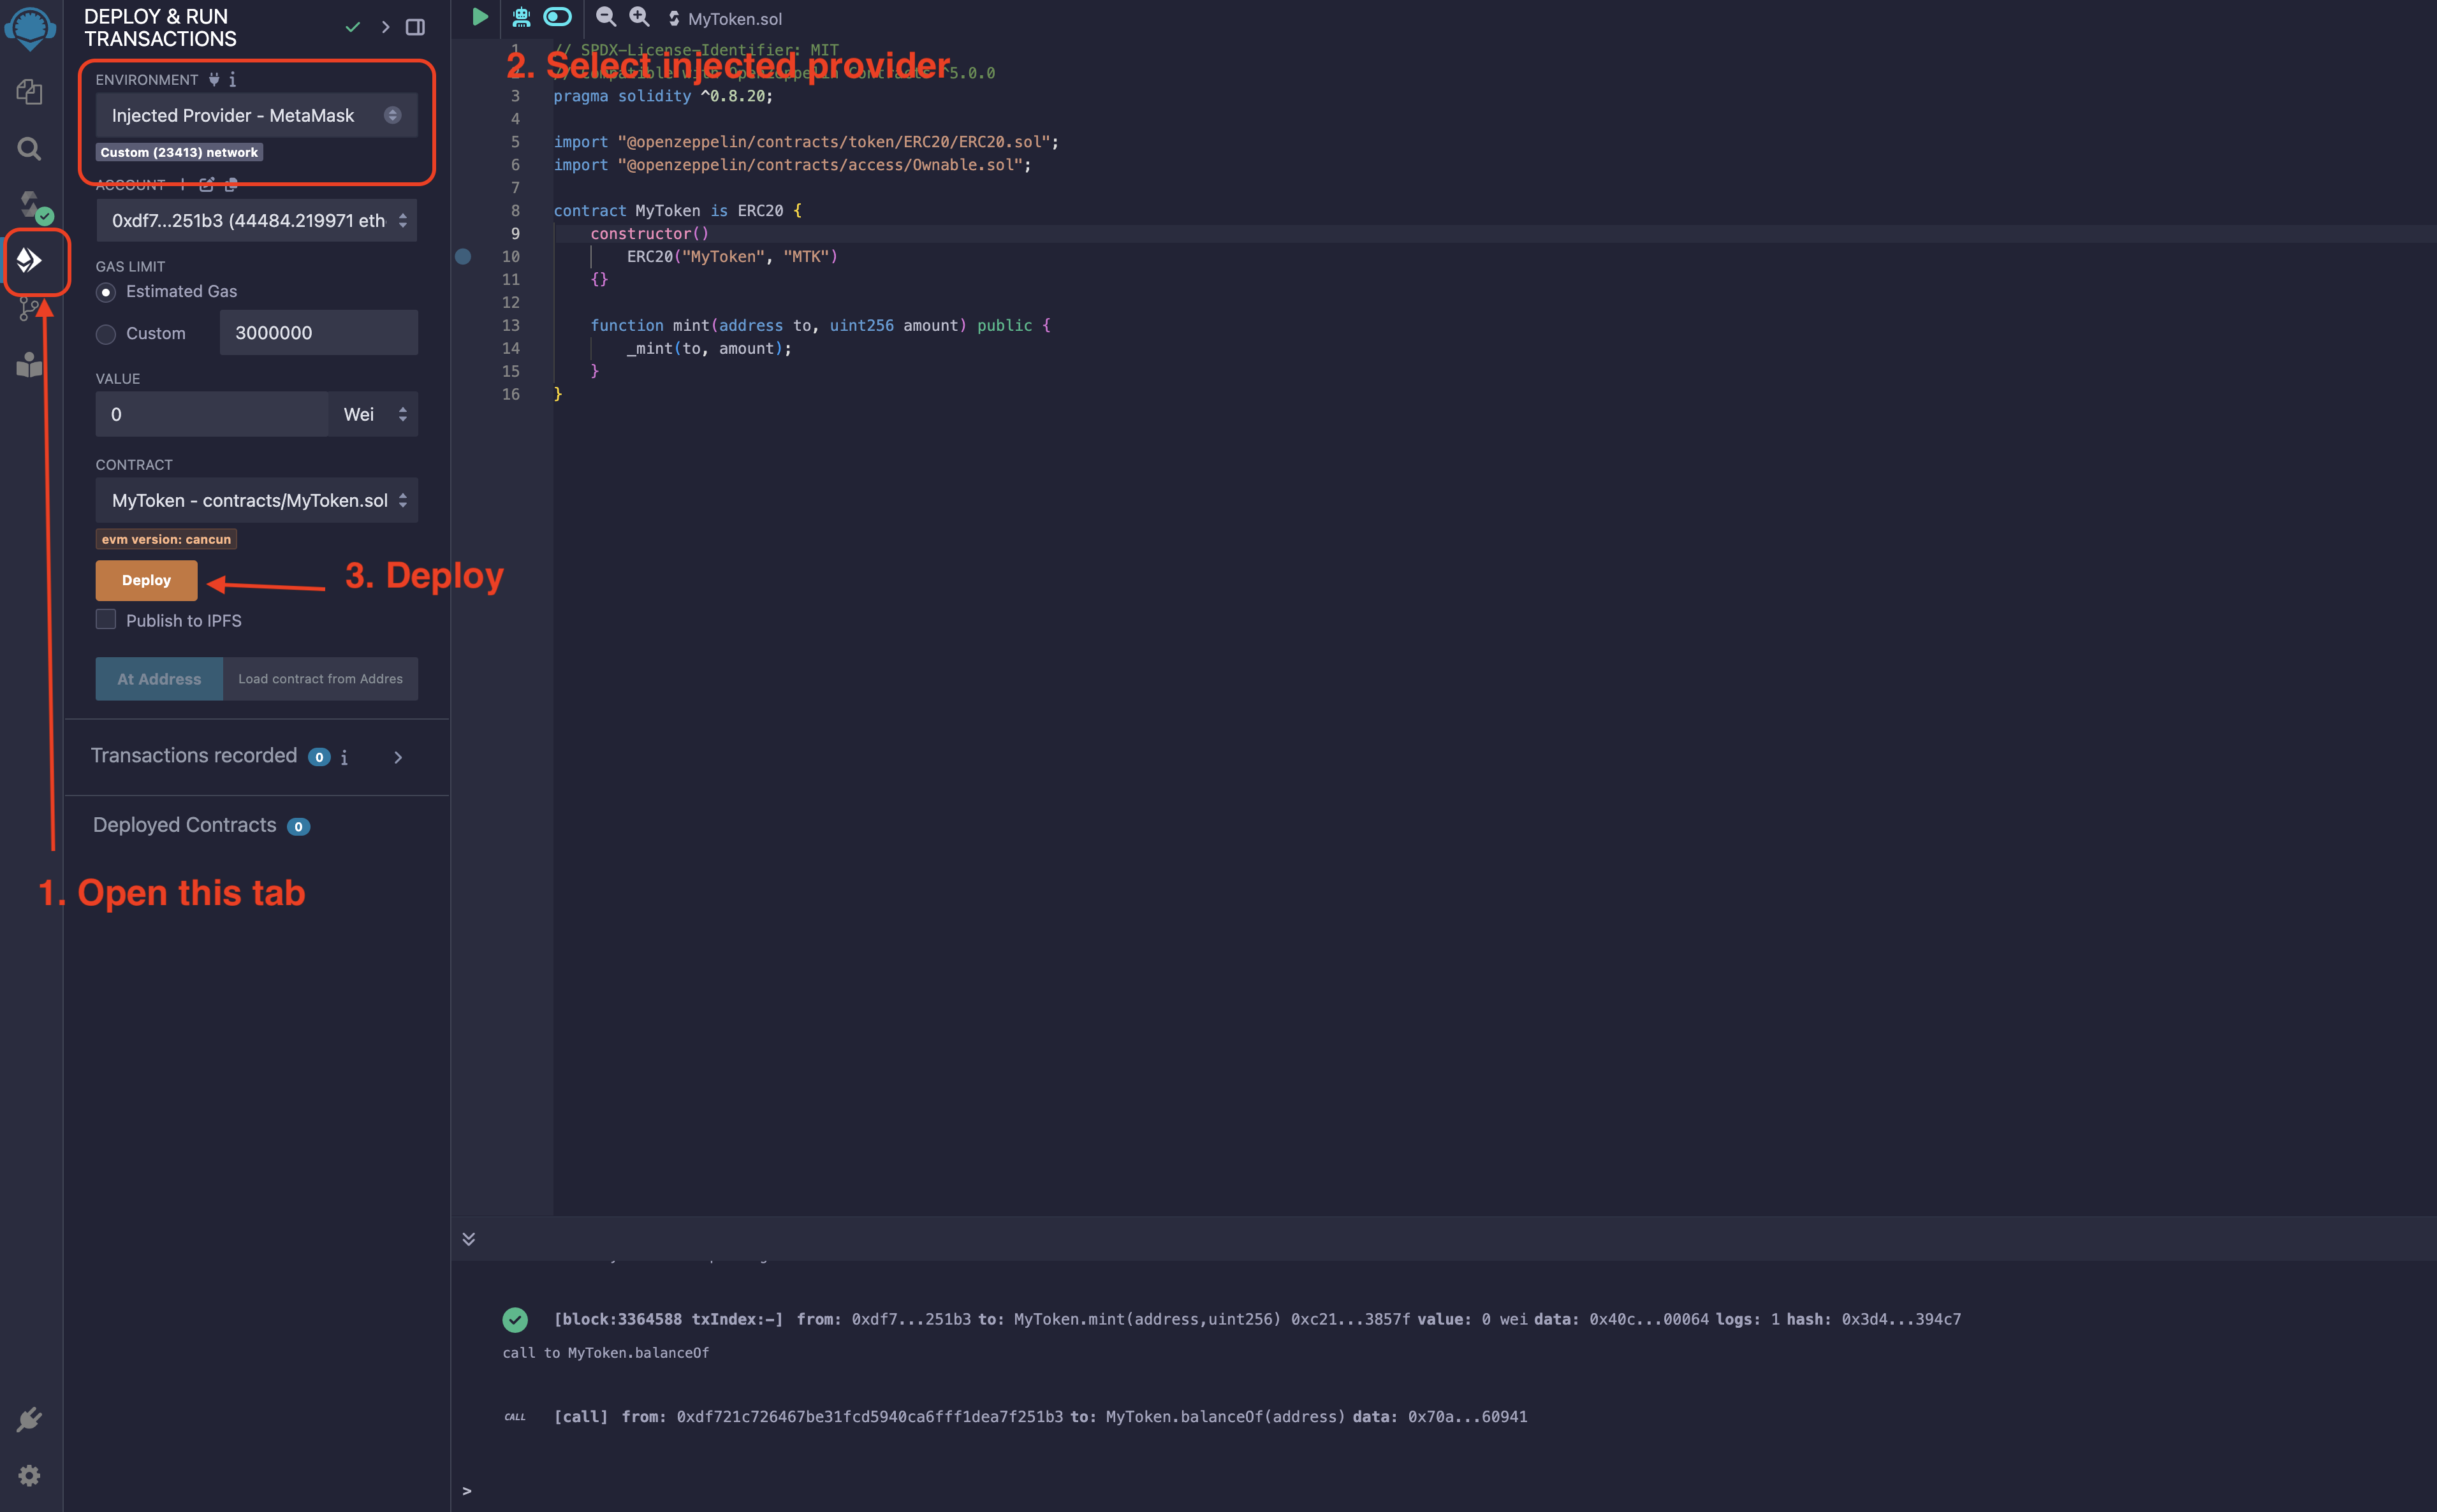
- Navigate to the "Deploy & Run Transactions" tab.
- Set the environment to "Injected provider - MetaMask".
- Click "Deploy" to deploy your contract.
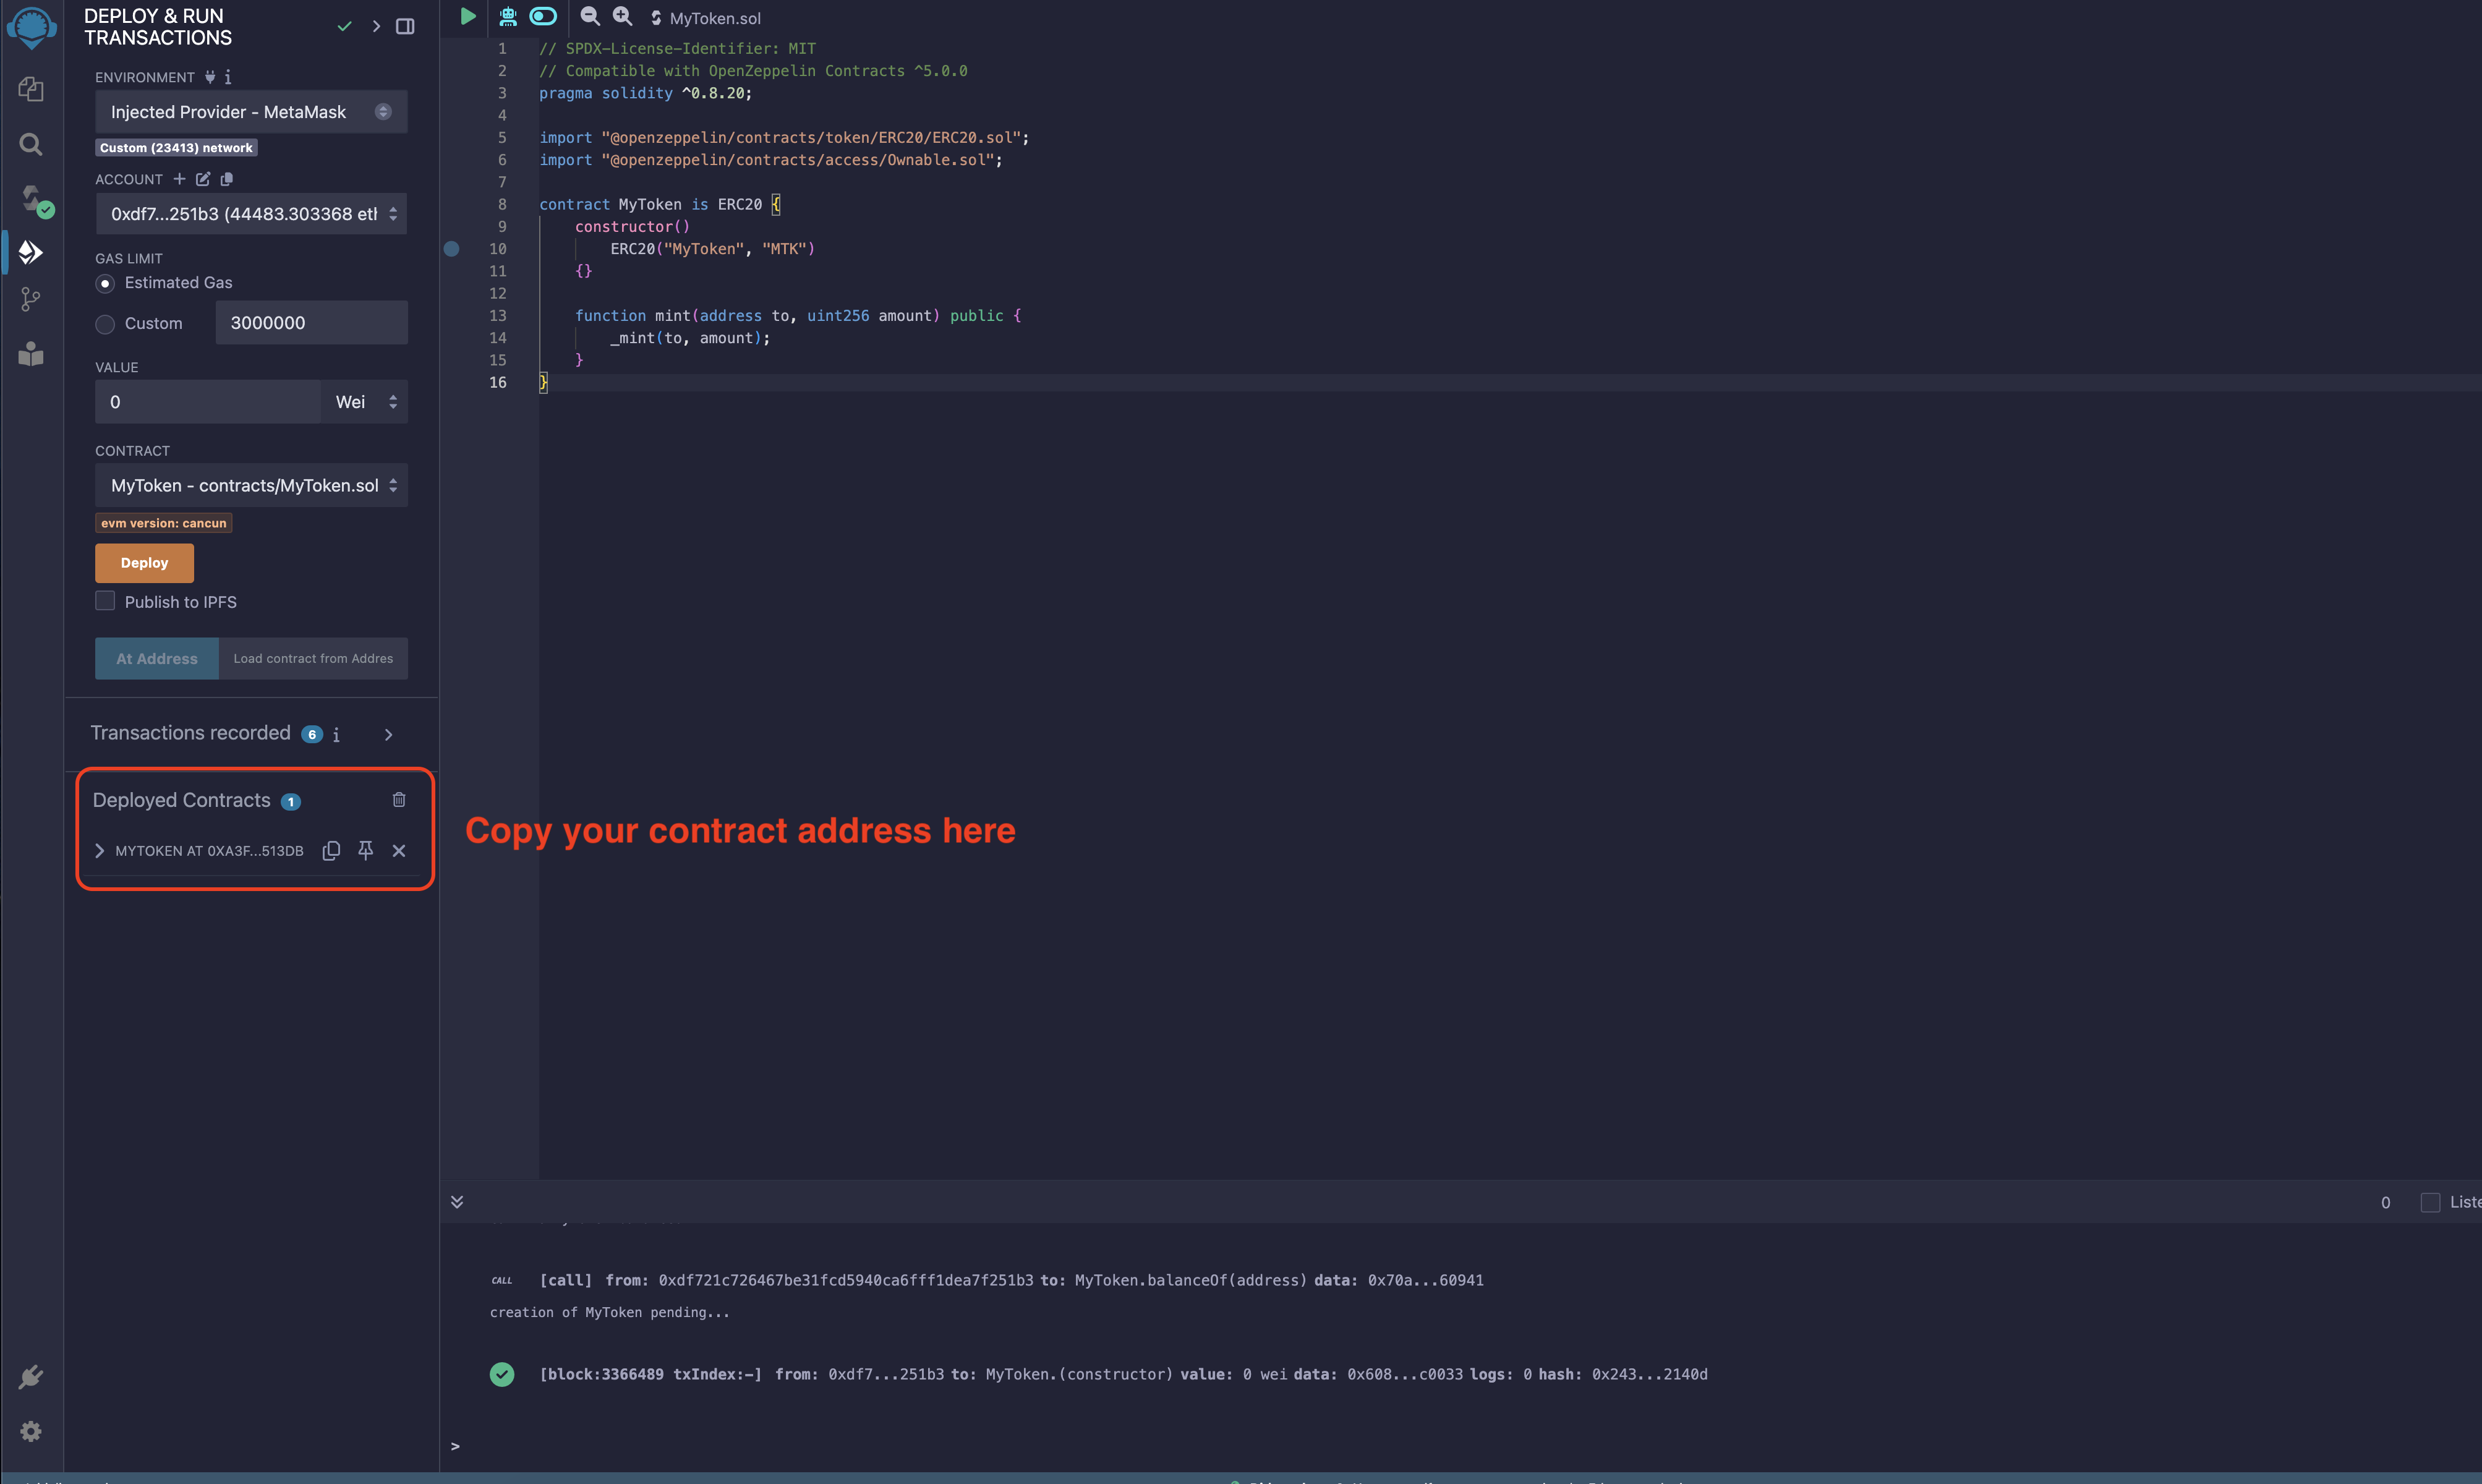
After successful deployment, you'll need to copy two crucial pieces of information:
- The contract address
- The contract ABI (Application Binary Interface)
You can find both in the "Deployed Contracts" section.
NoteThe contract address and ABI are essential for interacting with your deployed contract.

With your contract address and ABI in hand, you can now interact with your deployed contract through the UI. The results should match those from the previous step.
Step 3: The code behind the UI
First, you need to install web3-connect-react package
pnpm install web3-connect-react
Then, you can use the following code to interact with your contract:
'use client'

import { Button } from '@/components/ui/button'
import { Card, CardContent, CardHeader, CardTitle } from '@/components/ui/card'
import { Input } from '@/components/ui/input'
import { Loader2, RefreshCw, Trash } from 'lucide-react'
import { useEffect, useState } from 'react'
import { useWallet } from 'web3-connect-react'

export function InteractArea({
  contractAddress,
  abi,
}: {
  contractAddress: string
  abi: any
}) {
  const [value, setValue] = useState<string>('')
  const [currentBalance, setCurrentBalance] = useState<string>('')
  const [isMinting, setIsMinting] = useState<boolean>(false)
  const [isRefreshing, setIsRefreshing] = useState<boolean>(false)
  // use wallet is a custom hook that returns the sdk and wallet address. You can also use this to sign in and sign out.
  // this provides you to interact with multiple wallets like metamask, walletconnect, etc on multiple chains.
  const { sdk, walletAddress } = useWallet()

  useEffect(() => {
    getBalance()
  }, [sdk, walletAddress, sdk.provider, contractAddress])

  const getBalance = async () => {
    if (!walletAddress || !sdk || !sdk.provider || !contractAddress) {
      return
    }
    if (!abi) {
      return
    }
    try {
      setIsRefreshing(true)
      const result = await sdk.callContractMethod(
        contractAddress,
        abi,
        'balanceOf',
        [walletAddress],
      )
      setCurrentBalance(result)
    } catch (error: any) {
      console.error(error)
      alert(error.message)
    } finally {
      setIsRefreshing(false)
    }
  }

  const mint = async () => {
    if (!walletAddress || !sdk || !sdk.provider || !contractAddress) {
      return
    }
    if (!abi) {
      return
    }
    try {
      setIsMinting(true)
      await sdk.callContractMethod(contractAddress, abi, 'mint', [
        walletAddress,
        value,
      ])
      await getBalance()
    } catch (error: any) {
      console.error(error)
      alert(error.message)
    } finally {
      setIsMinting(false)
    }
  }

  return (
    <CardContent className="space-y-4">
      <div className="space-y-2">
        <label htmlFor="amount" className="text-sm font-medium">
          Enter an amount
        </label>
        <Input
          id="amount"
          placeholder="Enter an amount"
          type="number"
          value={value}
          onChange={(e) => setValue(e.target.value)}
        />
      </div>
      <div className="flex items-center justify-between">
        <span className="text-sm">Current balance: {currentBalance}</span>
        <Button
          variant="outline"
          size="icon"
          onClick={getBalance}
          disabled={
            isRefreshing || !walletAddress || !sdk || !sdk.provider || !abi
          }
        >
          <RefreshCw
            className={`h-4 w-4 ${isRefreshing ? 'animate-spin' : ''}`}
          />
          <span className="sr-only">Refresh balance</span>
        </Button>
      </div>
      <Button
        className="w-full"
        onClick={() => mint()}
        disabled={
          isMinting ||
          value.length === 0 ||
          !walletAddress ||
          !sdk ||
          !sdk.provider ||
          !abi
        }
      >
        {isMinting ? (
          <>
            <Loader2 className="mr-2 h-4 w-4 animate-spin" />
            Minting...
          </>
        ) : (
          'Mint'
        )}
      </Button>
      <hr />
      <span className="mt-2 text-xs">
        Contract Address: <span className="text-xs">{contractAddress}</span>
      </span>
    </CardContent>
  )
}